
If customers receive an email that looks like it came from your business, they should have a reason to trust it. SPF, DKIM and DMARC help receiving mail systems check whether a message really came from an approved sender.
They do not replace staff training or a secure Microsoft 365 setup. They address a narrower problem: someone sending mail that pretends to be from your domain.
What SPF, DKIM and DMARC do
SPF lists the mail servers allowed to send on behalf of your domain. The receiving server checks the sender against that list.
DKIM adds a digital signature to outgoing mail. The receiving server checks the signature against a public key in your DNS.
DMARC tells the receiving server what to do when SPF or DKIM fails. It also lets you receive reports about messages using your domain.
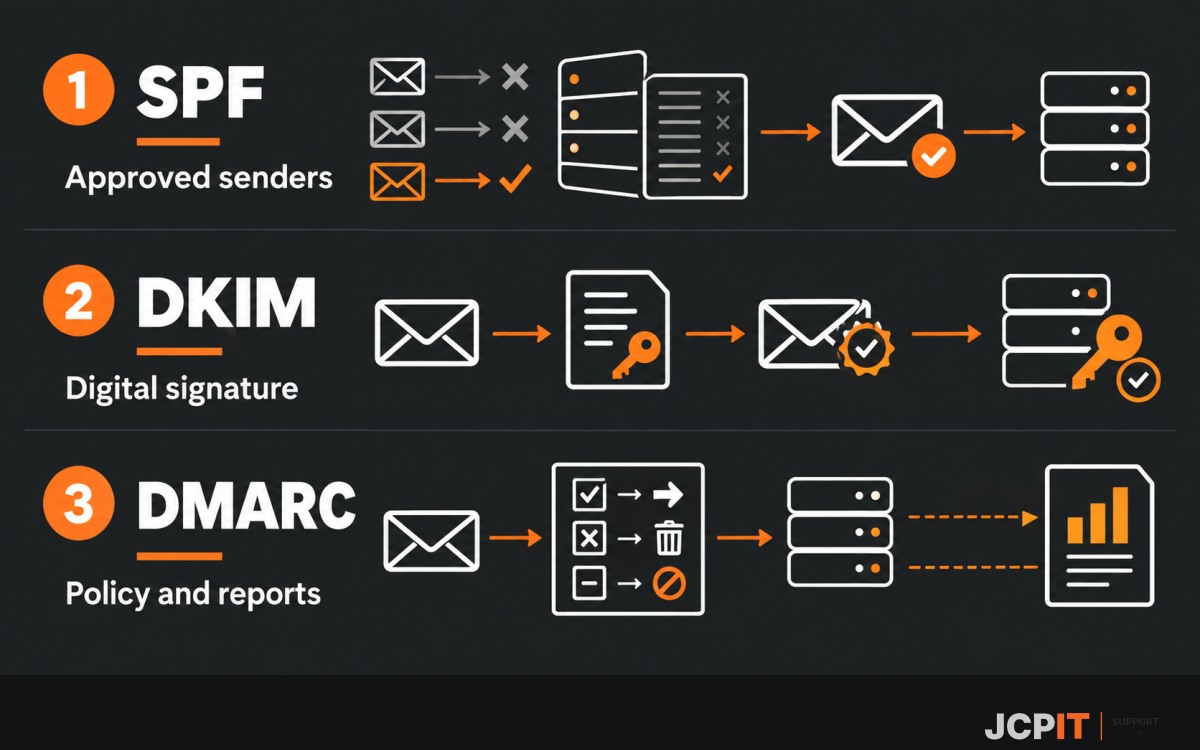
Microsoft explains how these three controls work together in its email authentication guidance. The Australian Cyber Security Centre’s email security guidance also covers steps businesses can take to protect email.
Want to check your domain first? Use the free JCPIT domain scanner to review the public SPF, DKIM and DMARC records for your domain. It gives you a useful starting point before you make changes. A scan cannot confirm every sending service or replace a review of your Microsoft 365 setup.
Start with an inventory of senders
Before changing DNS, write down every service that sends email using your domain. Include Microsoft 365, website forms, accounting platforms, marketing tools, booking systems and any device or application that sends alerts.
Missing one sender can cause legitimate messages to fail after you tighten the policy. An old SPF record can cause the same problem if it includes services you no longer use.

Check SPF without creating a second record
Your domain should have one SPF TXT record. If you publish two, receiving systems may treat SPF as invalid.
Use the sending services’ current documentation to build one record. Do not copy an SPF record from another business, and do not leave old providers in the record after you stop using them.
Turn on DKIM for Microsoft 365
Microsoft 365 gives your domain DKIM records to publish in DNS. After those records exist, enable DKIM in the Microsoft Defender portal and confirm that both the DNS records and signing status are correct.
If another service sends as your domain, follow that provider’s DKIM setup as well. Keep a note of who owns each DNS record, because the next change may happen months from now.
Use DMARC in stages
Start with a monitoring policy such as p=none. Review the reports and fix legitimate senders first. Once you understand the results, consider moving to a stricter policy such as p=quarantine or p=reject.
Do not jump straight to p=reject if you have not inventoried your senders. That can stop real business messages, especially from older systems that nobody remembers configuring.
Five checks to keep on file
- There is one SPF record for the domain.
- Every approved sending service is documented.
- Microsoft 365 DKIM is enabled and verified.
- DMARC reports go to a monitored mailbox or reporting service.
- A test message passes authentication and reaches an external mailbox.
Review it when the business changes
Check these records when you change email providers, websites, marketing platforms or domain DNS. A short review after each change is easier than finding out later that invoices or customer replies are disappearing.
If you are unsure which services send mail for your domain, JCPIT Support can help map the current setup and make the changes in a controlled order.